Verify domain on Facebook Business Manager is an easy process. Domain Verification is the process of claiming ownership of your domain on Facebook Business Manager. While creating and setting business manager, you need to verify your domain.
So, in this article, I will discuss the three different ways to question how to verify my domain on Facebook.
Table of Contents
Why Do I verify the domain on Facebook Business Manager?
Advertisers and businesses need to verify the domain on Facebook Business Manager because Apple iOS 14 updates affected the way Facebook conversion events are received by the Facebook Pixel.
Moreover, Facebook ad performance and tracking were also limited for both site and app conversion.
Facebook advertisers and businesses are able to track eight standard conversion events. They also can track one top-priority conversion event for those who opt out.
So, Facebook encouraged digital marketers to change the way of advertise their businesses on Facebook. The important & major change was to verify domain on Facebook business manager.
By verifying the domain on Facebook Business Manager, the owners have the authority to choose the top-priority conversion event.
You can also claim ownership of your business domain in the Facebook business manager. So, without verifying a domain, business owners can face disruptions to tracking data and claiming ownership.
How do I add my domain to Facebook Business Manager?
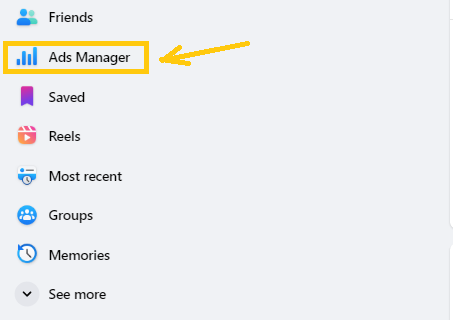
- Click on the Ad Manager tab present on the left side of the screen
- Tap three horizontal lines that represent All tools for the Facebook ads manager. You can access Business settings, Events manager, Payment methods, Media library, Meta business suite, etc.
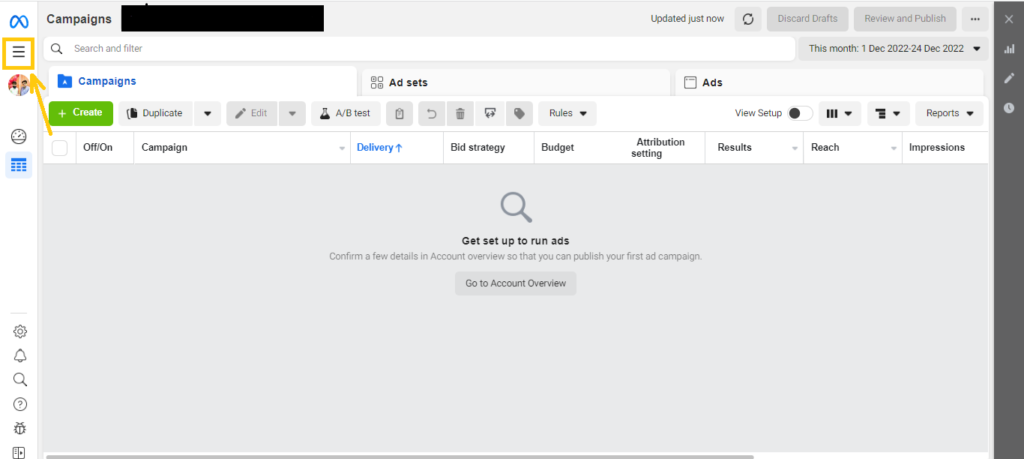
- Click Business settings from the Shortcuts section of All tools of Facebook ads manager

- Click Business settings from the Manage Business section if Business settings are not present in the shortcuts section Select your Business account.
- Select and click the Create Business tab if the Business account is not created.
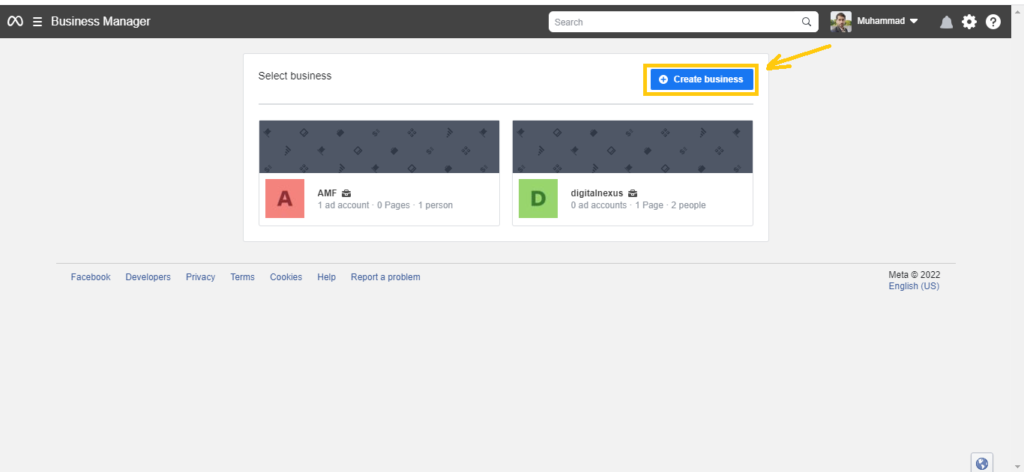
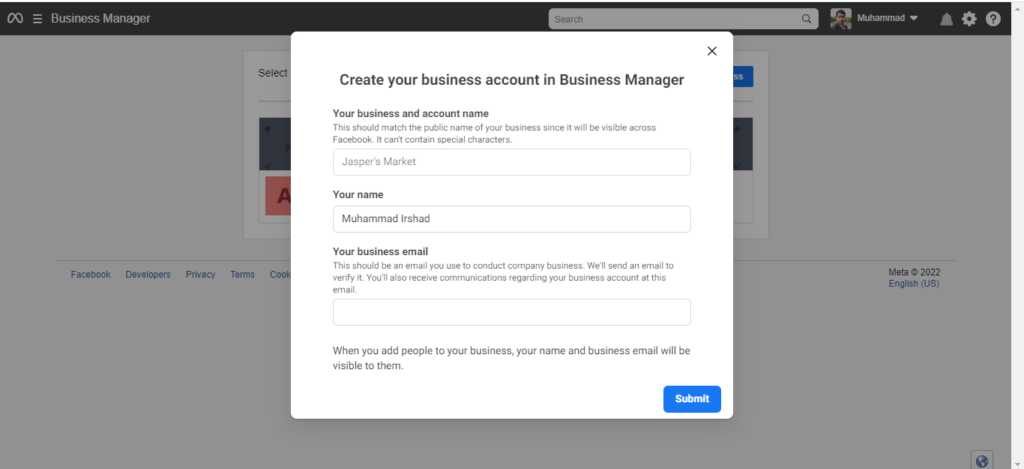
To create a new Business account in the Business Manager, you need to provide your business name, your name, and your business email.
- Tap Submit and your new business account will be created.
- If you have already created a Business account, click on your business account. A new page will open with business settings.
With a business account, you can add new people, and manage pages, ad accounts, and Instagram and WhatsApp accounts.
You can create and manage Events and Conversion for tracking easily with a business account.
- Scroll down and hit on the Brand Safety tab
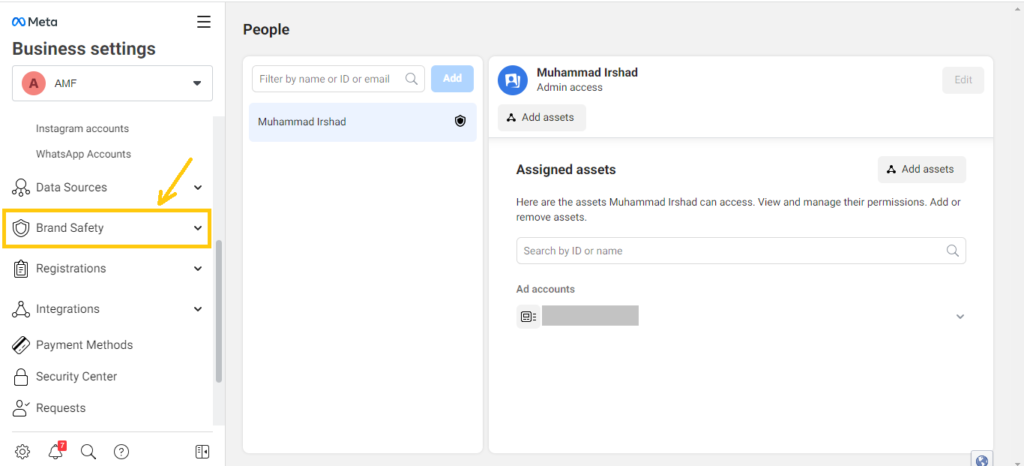
- Click on Domains and then click on the Add button to add a new Domain
- Click on Create a new domain (+) icon
Here you need to type or add your domain in the box.
Read carefully all the given instructions by Facebook to add a domain.
In the next step, you can verify domain on Facebook Business Manager in three different ways. You can select any one option to verify the domain on Facebook.
You can verify domain on Facebook Business Manager by:
- Meta Tag Verification
- Uploading HTML File to the root directory
- Updating DNS TXT record
Option #01 Verify domain on Facebook Business Manager by using Meta Tag
You need to copy the tag and paste it into the header section of your website theme editor file. For this:
- Copy the Meta Tag
- Open your website WordPress admin panel dashboard
- Scroll down and click the Appearance tab and then click on the Theme editor
- Locate the header section and paste the Tag there. Scroll down and click the Publish button.
After you have published the home page, you need to confirm the visibility of the tag by visiting the site.
- Now click on Verify domain. It takes usually 72 hours to verify the domain.
Option #02 Verification of Domain on FB Business Manager by uploading HTML File to the root directory
You can verify domain on Facebook Business Manager by uploading an HTML verification file to the root directory of your website.
First of all, you need to follow the first 9 steps. Then you can move forward with the following steps:
- Select the option Upload an HTML file to your root directory
- Download the HTML verification file.
- Upload the file to the root directory of your website.
If you see the verification code by clicking the given website link, it means that you have successfully uploaded the HTML verification file.
- Click Verify domain. Your domain will be successfully verified in the next 72 hours.
Option #03 Verify your domain by updating the DNS TXT record
This method of verification includes updating the DNS TXT record to your domain host.
Again follow the first 9 steps and then move forward with the following steps:
- Visit the website of your hosting provider. Log into your account and find the DNS record section
- Add the TXT record given by Facebook to your DNS configuration.
- Hit the Verify Domain. Once you have uploaded the TXT record, you need to wait for the verification of your domain. It usually takes 72 hours to verify the domain.
FAQs
How do I know my domain is verified?
Visit Facebook Business Manager. Goto Domain section by visiting Brand Safety Tool in the Facebook Business Manager. You will see the green dot next to your domain name. Hover the dot and a black strip will show with the status that your domain is verified.
Why can’t I verify my domain?
Your domain verification is only available for published landing pages. So for domain verification, you need to publish your landing pages.


